Apple Sign In
Apple adopted the existing open standards OAuth 2.0 and OpenID Connect to use as the foundation for their new API. While they don’t explicitly call out OAuth or OIDC in their documentation, they use all the same terminology and API calls.
The hardest part of this whole process is registering an application in the Apple Developer Portal. Typically, OAuth providers have a relatively straightforward process to register a new application which will give you a client ID and secret. But since Apple’s API is tied to their whole iOS app ecosystem, it’s a bit more complicated. They’ve also opted to use a public/private key client authentication method rather than a traditional client secret. But don’t worry, we’ll go through this step by step.
To enable Apple Sign In you will need the following info:
- id -> Your Apple ID
- team_id -> Your Apple team id
- key_id -> Your Apple key id
- key_file -> Full path to your Apple key file
# Enable email delivery
Sign in to https://developer.apple.com/account/resources (opens new window)
Click on “More …” and add domains and email addresses (requires SPF and DKIM, probably also an Apple ID in .well-known)
# Keys & IDs
Sign in to https://developer.apple.com/account/resources (opens new window)
# Identifiers
# App ID
Create the primary ID for “Sign in” service.
# Service ID
Create a service ID of the type Sign in with Apple and assign it to the app ID, then fill in your domains.
The Apple Service ID is your OAuth2 Client ID.
# Key ID and private key
Create a new key for your Sign-In Service. This gets you a key ID (under details) and the private key (download)
Store the private key in a secure path on your server and save the path you will use this path as key_file when saving your Apple Settings
TIP
- Don’t forget to fill in the key name (there will be no error message if you forget).
- Downloading the privacy key is only possible once.
# Team ID
This is your Account ID at the top right of the account information (2nd line)
# Save your Apple settings
TIP
The secret is generated from a signed JWT (JSON Web Token). Instead of a secret you have to provide your team_id, key_id and key_file in your configuration. You don’t need to generate a secret yourself.
To save the settings explained above please save the following settings on your config/general.php file
"socializer" => [
        "apple" => [
            "enabled" => true,
            "keys" => [
                "id" => getenv("YOUR_APPLE_ID"),
                "team_id" => getenv("YOUR_APPLE_TEAM_ID"),
                "key_id" => getenv("YOUR_APPLE_KEY_ID"),
                "key_file" =>  getenv("FULL_PATH_TO_YOUR_APPLE_KEY_FILE")
        ],
        "scope" => "name email",
        "verifyTokenSignature" => true
    ]
]
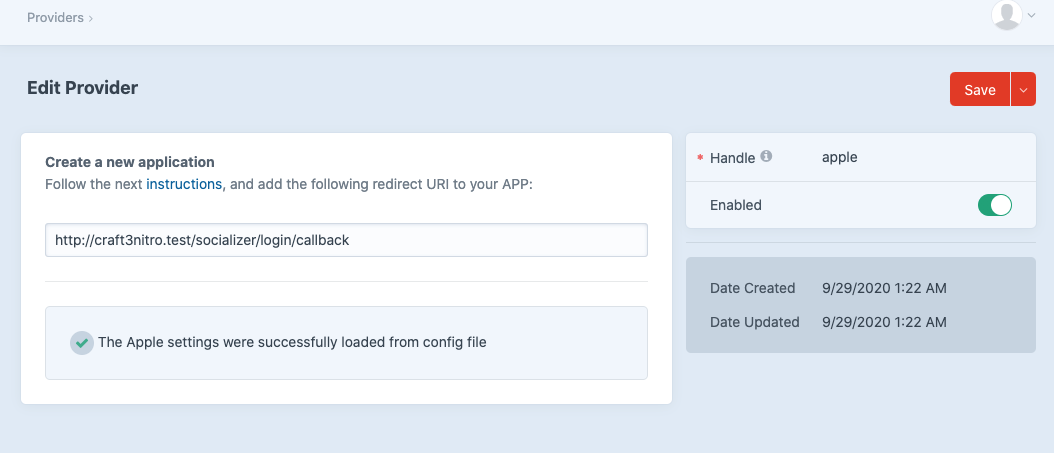
# Settings saved successfully
Once you have added your Apple settings you will see the following message on your Apple provider

# Useful Links
- https://developer.apple.com/sign-in-with-apple/get-started (opens new window)
- https://developer.okta.com/blog/2019/06/04/what-the-heck-is-sign-in-with-apple (opens new window)
- https://sarunw.com/posts/sign-in-with-apple-2 (opens new window)
# FAQs - reasons for authentication failures
- Missing first/last/display name in getUserProfile(): Apple sends this information only on the very first time the user authorizes the app (see https://developer.apple.com/documentation/sign_in_with_apple/sign_in_with_apple_js/configuring_your_webpage_for_sign_in_with_apple (opens new window) ), so you have only one chance to save this information (make sure to have enabled the "Enable User Sign Up" on your plugin settings). To receive this data for a second time, you have to revoke your authorization first: https://stackoverflow.com/questions/58018184/how-to-revoke-sign-in-with-apple-credentials-for-a-specific-app (opens new window)
- Have the right id (= Service ID, usually in reverse domain name notation e.g. “org.foo.bar”), team id, key id and the full path to your private key file configured.
- Make sure you have your domain(s) configured correctly in your Service ID. Your server must have the time set correctly (use ntpdate), otherwise signature validation might fail